
This document shows how to create and use markers in a script.
Markers provide a way to mark a location in the script that can be returned to by selecting a marker from a list or using the marker next and previous buttons.
1. Show the Controller by pressing the Controller button.
2. Scroll the script to a location where a marker should be added.
3. Press the Marker button on the controller to display the list of markers. 
4. To add a new marker to the current location, press the Add button. 
5. The new marker will be added to the bottom of the list. Press the Detail button to see the details for the marker. 
6. Enter a name in the Marker Label text field. 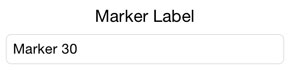
7. To update the marker to a different position, scroll to the new position and press the Update Position button. 
8. Press the Markers back button to return to the list of markers.
9. To go to a marker, select the marker from the list, the script will immediately scroll to the position for the marker.
10. To remove a marker, swipe it from right to left and use the Delete button. Or, press the Edit button and use the remove button for a marker to display the Delete button.
11. To hide the list of markers, press the Marker button in the Controller.
1. Display the Controller by pressing the Controller button.
2. To go to a specific existing marker, press the Marker button to display the markers and select the marker from the list.
3. Use the Previous Marker button to jump to the previous marker in the script relative to the current scroll position. 
4. Use the Next Marker button to jump to the next marker in the script relative to the current scroll position. 
See Also: